Intro
This weekend I installed the Windows 10 Spring Update, and was pretty excited to start playing with the new, builtin OpenSSH tools.
Using OpenSSH natively in Windows is awesome since Windows admins no longer need to use Putty and PPK formatted keys. I started poking around and reading up more on what features were supported, and was pleasantly surprised to see ssh-agent.exe is included.
I found some references to using the new Windows ssh-agent in this MSDN article, and this part immediately grabbed my attention:
I’ve had some good fun in the past with hijacking SSH-agents, so I decided to start looking to see how Windows is “securely” storing your private keys with this new service.
I’ll outline in this post my methodology and steps to figuring it out. This was a fun investigative journey and I got better at working with PowerShell.
tl;dr
Private keys are protected with DPAPI and stored in the HKCU registry hive. I released some PoC code here to extract and reconstruct the RSA private key from the registry
Using OpenSSH in Windows 10
The first thing I tested was using the OpenSSH utilities normally to generate a few key-pairs and adding them to the ssh-agent.
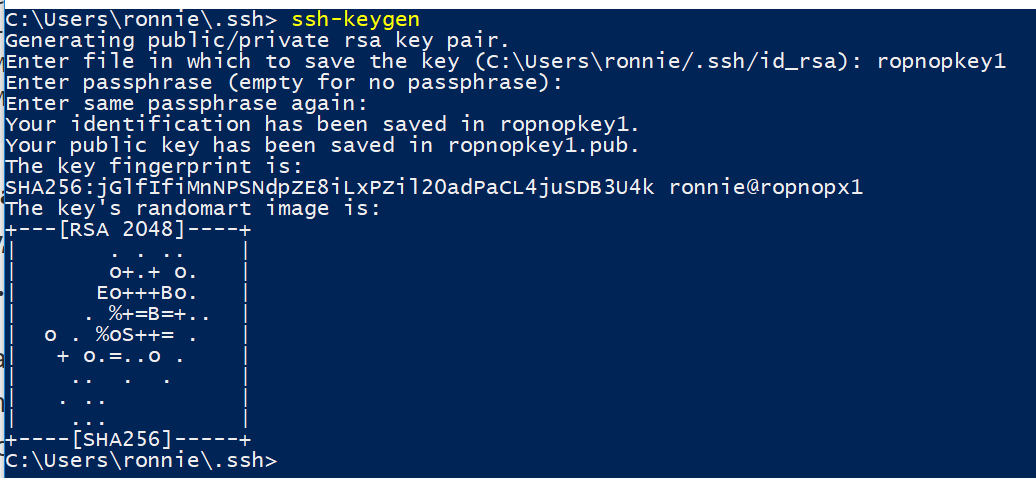
First, I generated some password protected test key-pairs using ssh-keygen.exe:
Then I made sure the new ssh-agent service was running, and added the private key pairs to the running agent using ssh-add:
Running ssh-add.exe -L shows the keys currently managed by the SSH agent.
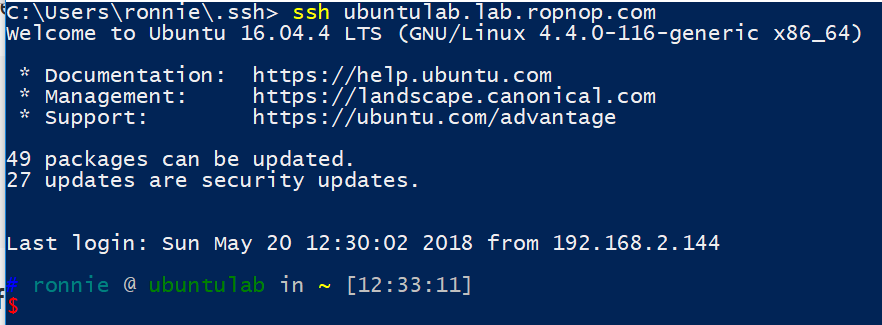
Finally, after adding the public keys to an Ubuntu box, I verified that I could SSH in from Windows 10 without needing the decrypt my private keys (since ssh-agent is taking care of that for me):
Monitoring SSH Agent
To figure out how the SSH Agent was storing and reading my private keys, I poked around a little and started by statically examining ssh-agent.exe. My static analysis skills proved very weak, however, so I gave up and just decided to dynamically trace the process and see what it was doing.
I used procmon.exe from Sysinternals and added a filter for any process name containing “ssh”.
With procmon capturing events, I then SSH’d into my Ubuntu machine again. Looking through all the events, I saw ssh.exe open a TCP connection to Ubuntu, and then finally saw ssh-agent.exe kick into action and read some values from the Registry:
Two things jumped out at me:
- The process
ssh-agent.exereads values from HKCU\Software\OpenSSH\Agent\Keys - After reading those values, it immediately opens
dpapi.dll
Just from this, I now knew that some sort of protected data was being stored in and read from the Registry, and ssh-agent was using Microsoft’s Data Protection API
Testing Registry Values
Sure enough, looking in the Registry, I could see two entries for the keys I added using ssh-add. The key names were the fingerprint of the public key, and a few binary blobs were present:
After reading StackOverflow for an hour to remind myself of PowerShell’s ugly syntax (as is tradition), I was able to pull the registry values and manipulate them. The “comment” field was just ASCII encoded text and was the name of the key I added:
The (default) value was just a byte array that didn’t decode to anything meaningful. I had a hunch this was the “encrypted” private key if I could just pull it and figure out how to decrypt it. I pulled the bytes to a Powershell variable:
Unprotecting the Key
I wasn’t very familiar with DPAPI, although I knew a lot of post exploitation tools abused it to pull out secrets and credentials, so I knew other people had probably implemented a wrapper. A little Googling found me a simple oneliner by atifaziz that was way simpler than I imagined (okay, I guess I see why people like Powershell…. ;) )
I still had no idea whether this would work or not, but I tried to unprotect the byte array using DPAPI. I was hoping maybe a perfectly formed OpenSSH private key would just come back, so I base64 encoded the result:
|
|
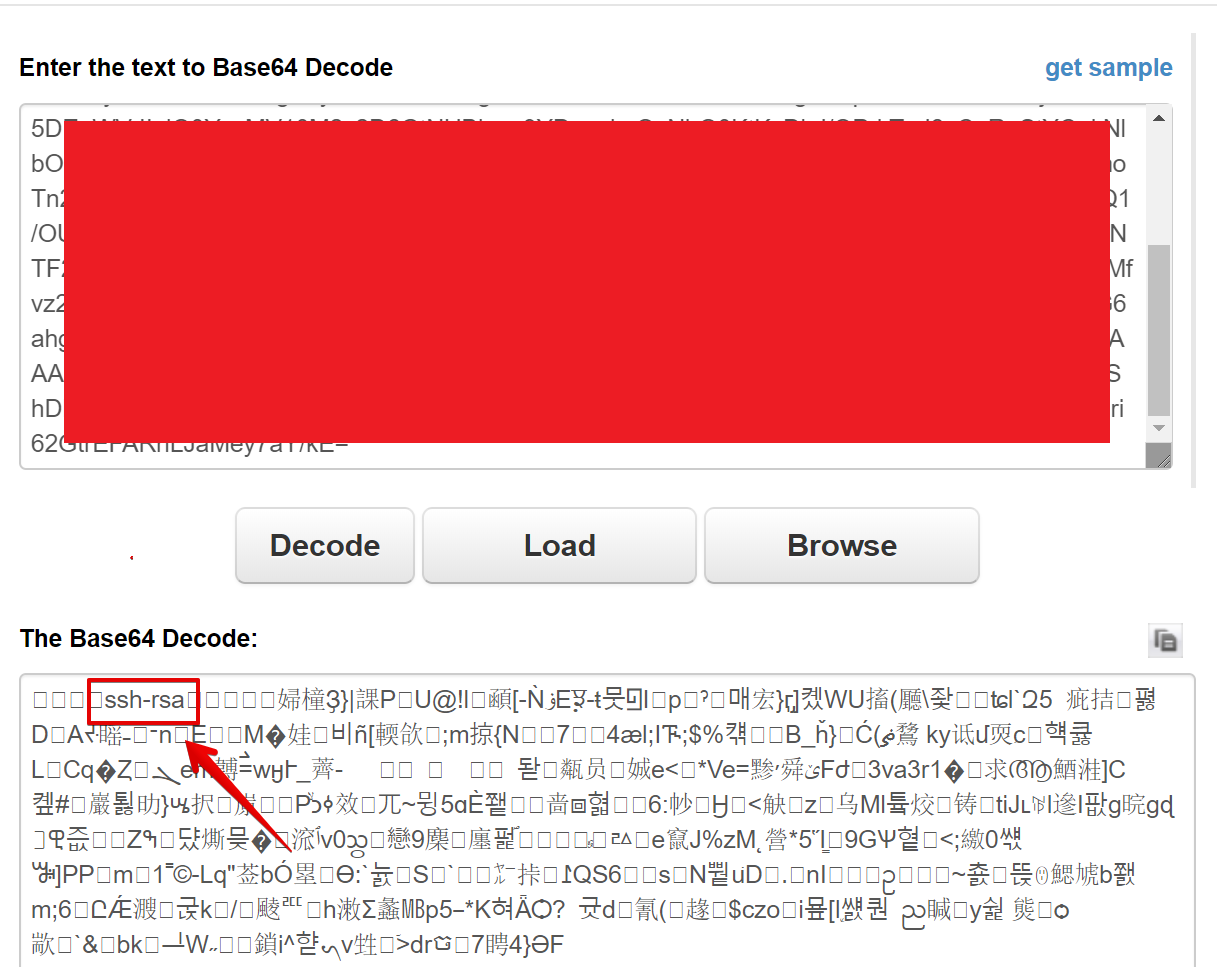
The Base64 returned didn’t look like a private key, but I decoded it anyway just for fun and was very pleasantly surprised to see the string “ssh-rsa” in there! I had to be on the right track.
Figuring out Binary Format
This part actually took me the longest. I knew I had some sort of binary representation of a key, but I could not figure out the format or how to use it.
I messed around generating various RSA keys with openssl, puttygen and ssh-keygen, but never got anything close to resembling the binary I had.
Finally after much Googling, I found an awesome blogpost from NetSPI about pulling out OpenSSH private keys from memory dumps of ssh-agent on Linux: https://blog.netspi.com/stealing-unencrypted-ssh-agent-keys-from-memory/
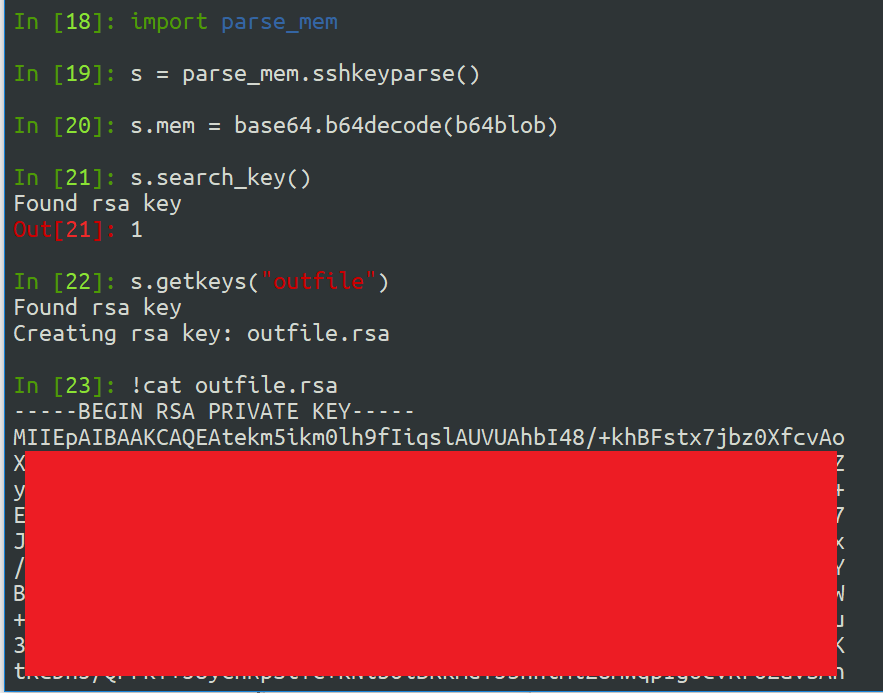
Could it be that the binary format is the same? I pulled down the Python script linked from the blog and fed it the unprotected base64 blob I got from the Windows registry:
It worked! I have no idea how the original author soleblaze figured out the correct format of the binary data, but I am so thankful he did and shared. All credit due to him for the awesome Python tool and blogpost.
Putting it all together
After I had proved to myself it was possible to extract a private key from the registry, I put it all together in two scripts.
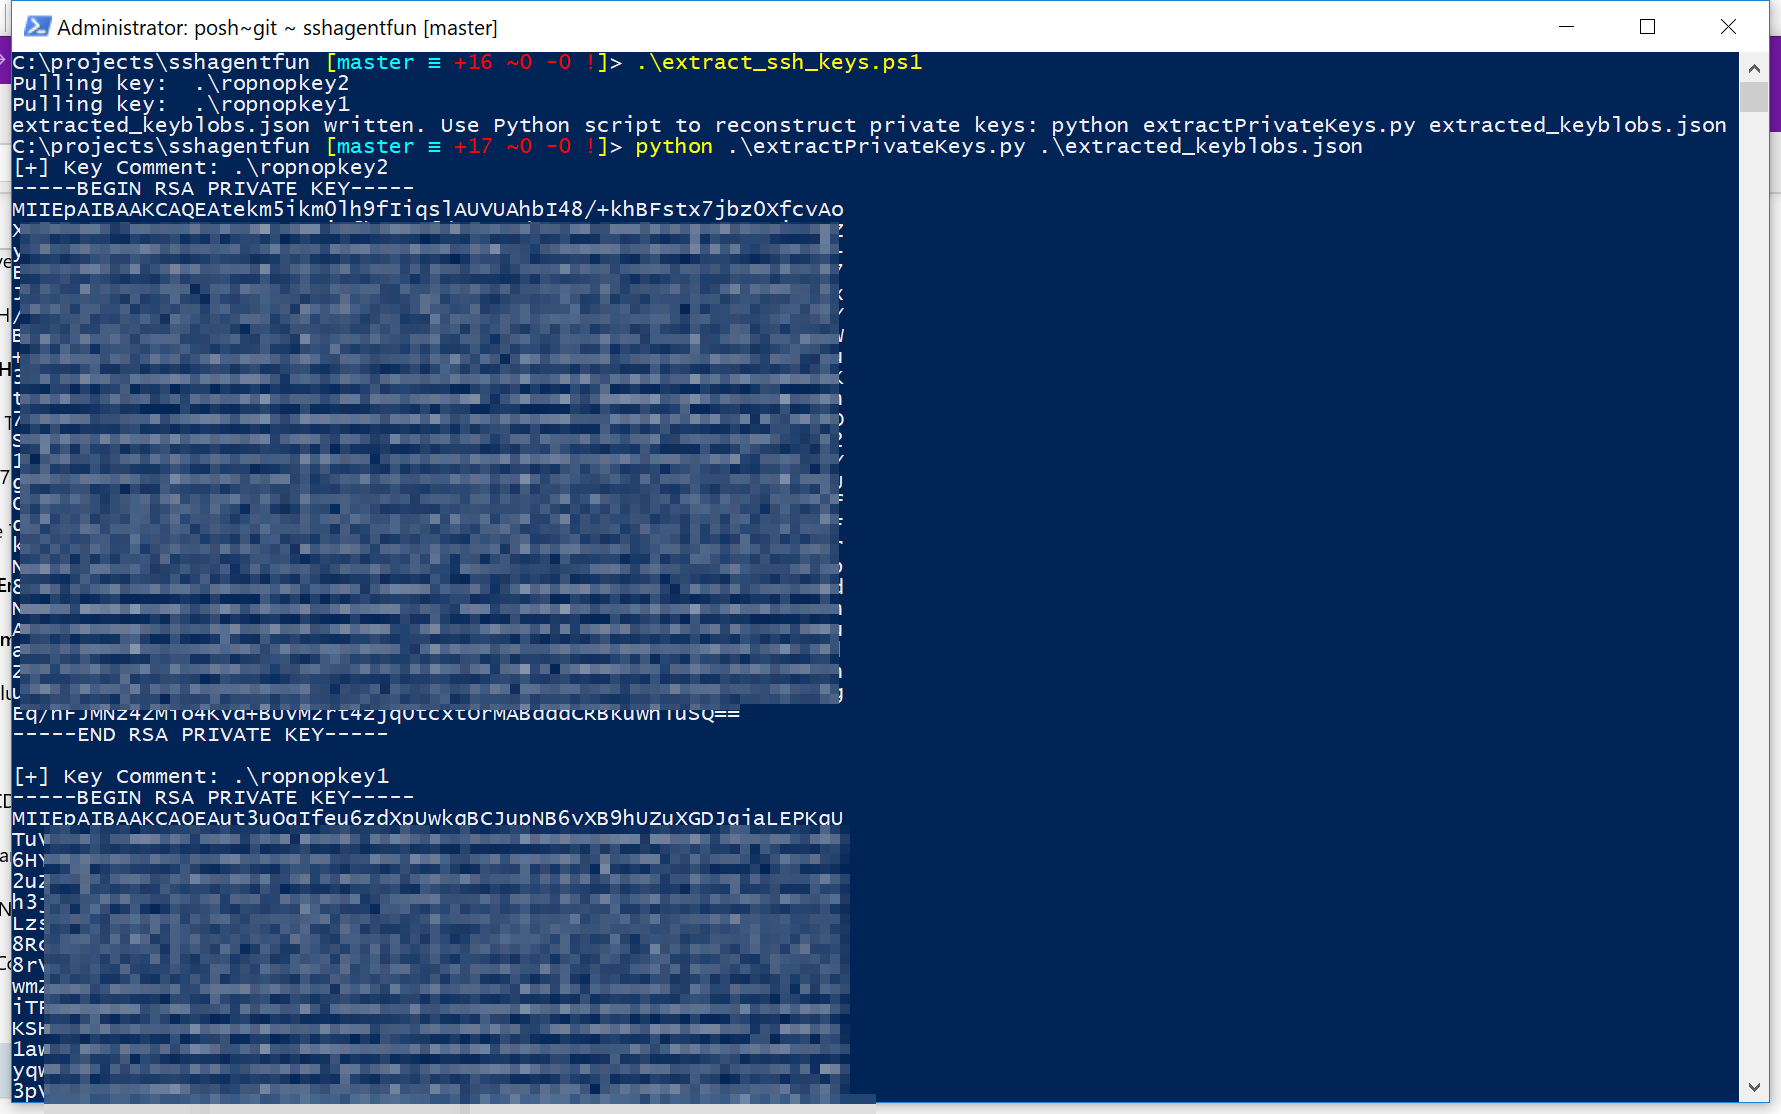
The first is a Powershell script (extract_ssh_keys.ps1) which queries the Registry for any saved keys in ssh-agent. It then uses DPAPI with the current user context to unprotect the binary and save it in Base64. Since I didn’t even know how to start parsing Binary data in Powershell, I just saved all the keys to a JSON file that I could then import in Python. The Powershell script is only a few lines:
|
|
I heavily borrowed the code from parse_mem_python.py by soleblaze and updated it to use Python3 for the next script: extractPrivateKeys.py. Feeding the JSON generated from the Powershell script will output all the RSA private keys found:
These RSA private keys are unencrypted. Even though when I created them I added a password, they are stored unencrypted with ssh-agent so I don’t need the password anymore.
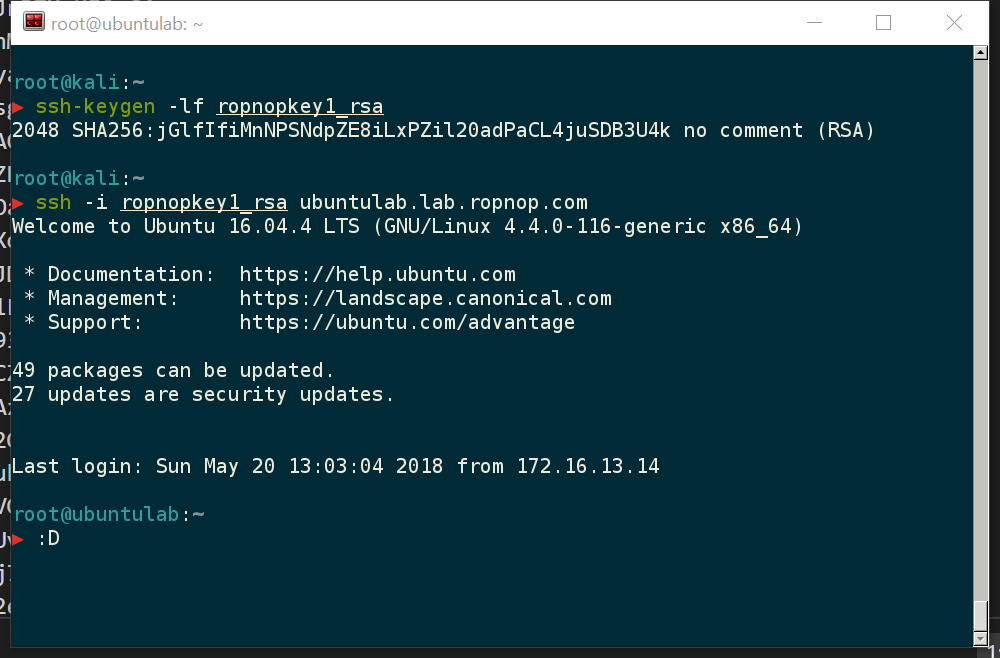
To verify, I copied the key back to a Kali linux box and verified the fingerprint and used it to SSH in!
Next Steps
Obviously my PowerShell-fu is weak and the code I’m releasing is more for PoC. It’s probably possible to re-create the private keys entirely in PowerShell. I’m also not taking credit for the Python code - that should all go to soleblaze for his original implementation.
I would also love to eventually see this weaponized and added to post-exploitation frameworks since I think we will start seeing a lot more OpenSSH usage on Windows 10 by administrators and I’m sure these keys could be very valuable for redteamers and pentesters :)
Feedback and comments welcome!
Enjoy -ropnop

