Intro
A recent tweet about a proposed change to the OWASP ASVS sparked a really great debate and challenged my understanding of different strategies around storing session tokens when building and designing single page applications. While plenty has been written on this previously, I learned a lot during my own research and wanted to share.
To help educate, I decided to make a series of “proof of concept” single page apps to illustrate each of the different strategies. I also wanted these to be completely bare-bones PoCs. While in reality most SPAs will probably leverage existing frameworks and libraries, I find that these abstractions make grasping concepts difficult - so I’m not using any JS frameworks - just simple, easy to follow, vanilla JavaScript.
To help illustrate what the ASVS debate was about, I also added a trivial “XSS” to each of the pages, and will also show what the impact of attacker controlled JS in these pages is capable of.
My “app” is composed of two APIs:
/api/login- this generates and returns a “session token” in either a cookie or in JSON data. There’s no username/password - just imagine that part :)/api/echo- this endpoint simply replies with any tokens it received, or says “Unauthorized” if none were sent. Imagine this is just an authenticated endpoint
So open up a new tab to https://tokenstorage.ropnop.dev and follow along!
Cookies
- PoC Page: https://tokenstorage.ropnop.dev/cookie.html
- Source Code: https://github.com/ropnop/tokenstorage/blob/master/cookie.html
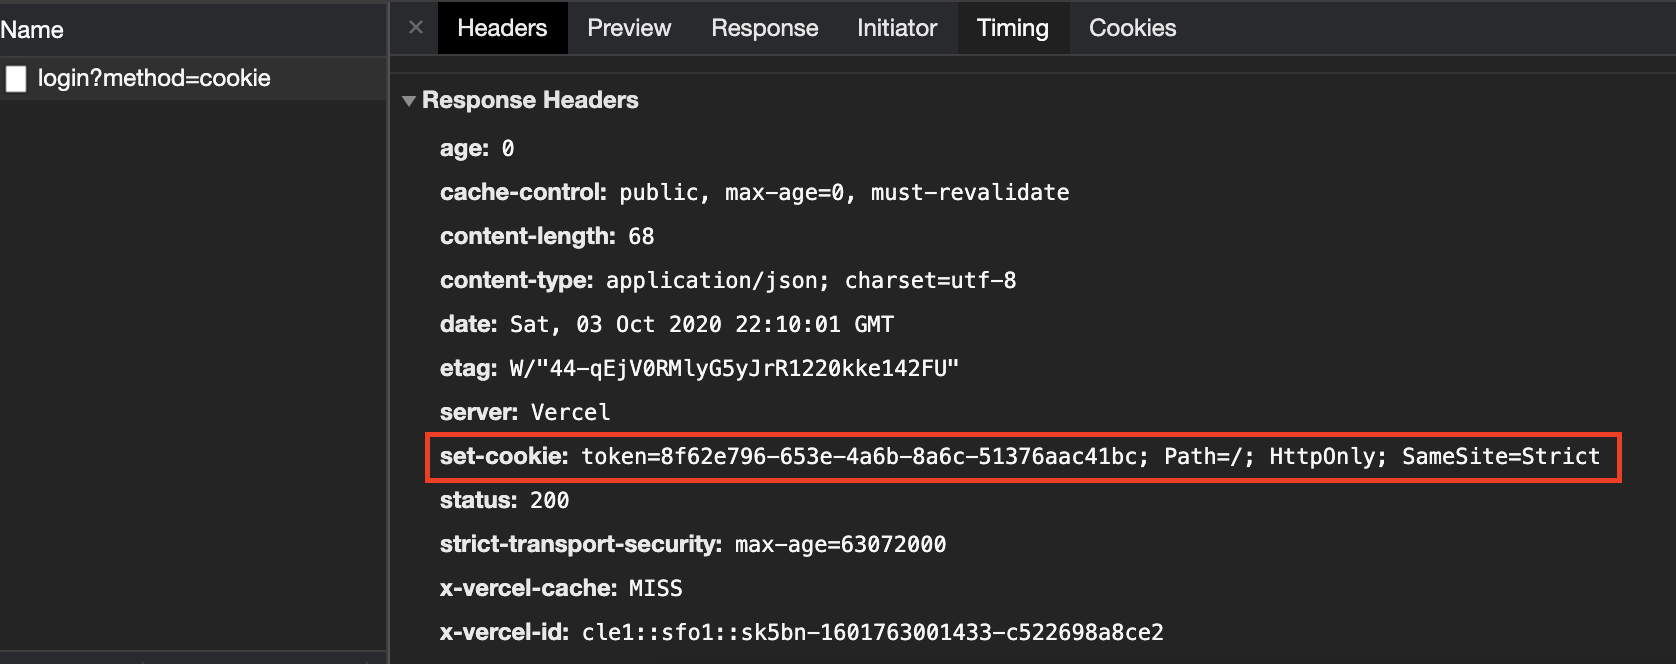
This is the “classic” approach, and predates Single Page Apps. In this scenario, after POST’ing to /api/login, the endpoint responds with the generated session token in the Set-Cookie header. You can verify this by clicking “Login and get a new token” and viewing the response in Developer Tools:
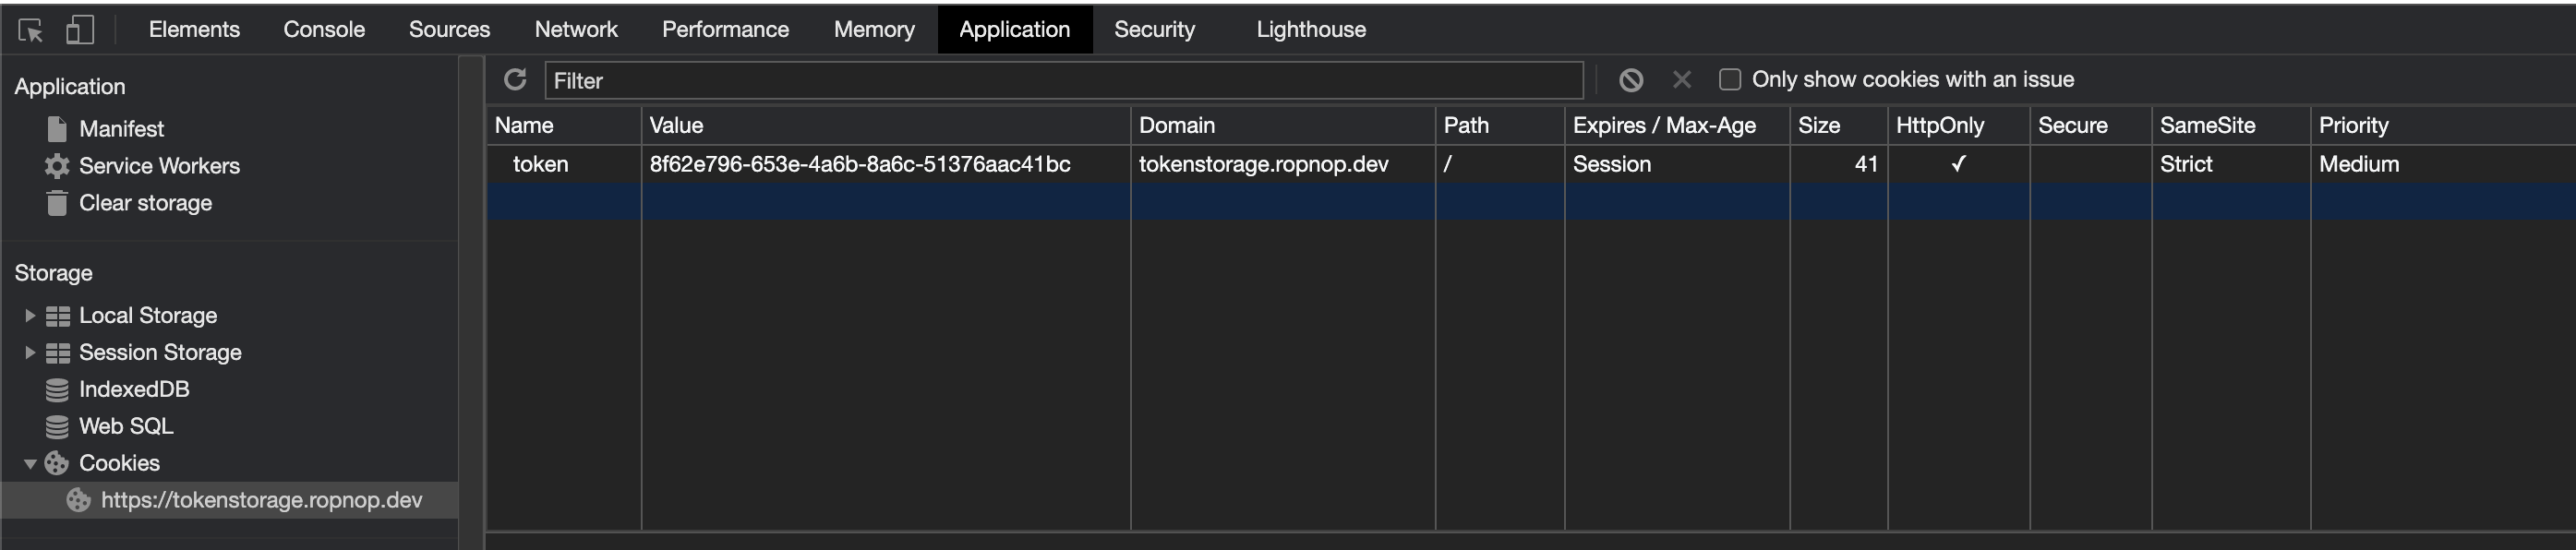
In this case, we are delegating “ownership” of our session token to the browser. The browser recognizes the value that was set, and saves it in its “cookie jar”, which is also viewable in Developer Tools:
Our client side code doesn’t need to do anything with the response body from /api/login - there is nothing to capture or remember since the browser saved the cookie for us. As long as that cookie value exists (and is not expired), the browser will automatically send the value to any endpoint that matches the domain and path set. This is great from a development perspective - we don’t need to even think about handling authentication ourselves, the browser will just send any matching cookies and we can make the check server side. But this can also have some bad unintended consequences (e.g. CSRF).
In our client side code, we don’t need to do anything special at all to send an authenticated request- the browser will send cookies for us (if they exist). So my vanilla JS API call just looks like this:
|
|
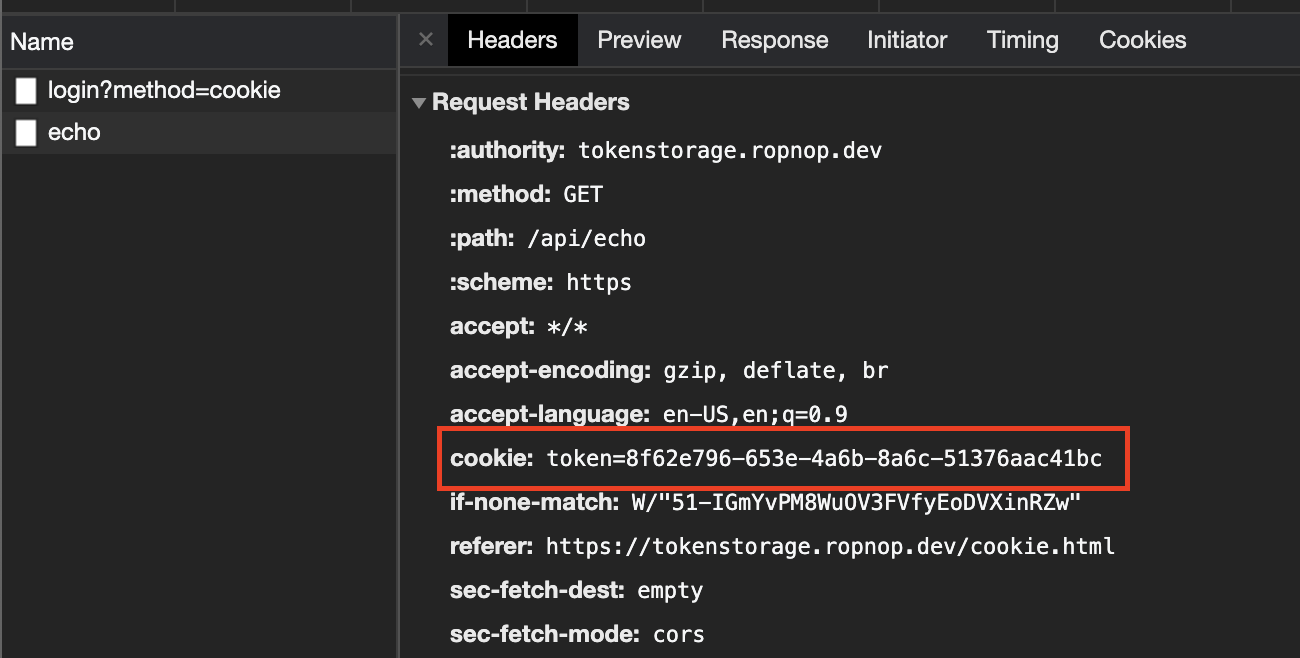
I just use fetch on a resource, and it works. You can verify this by clicking ‘Make an “authenticated” request’ in the page and see the server responds with the cookie value that was sent. You can verify the cookie gets sent “automatically” by looking at the request headers in the developer tools:
XSS Impact
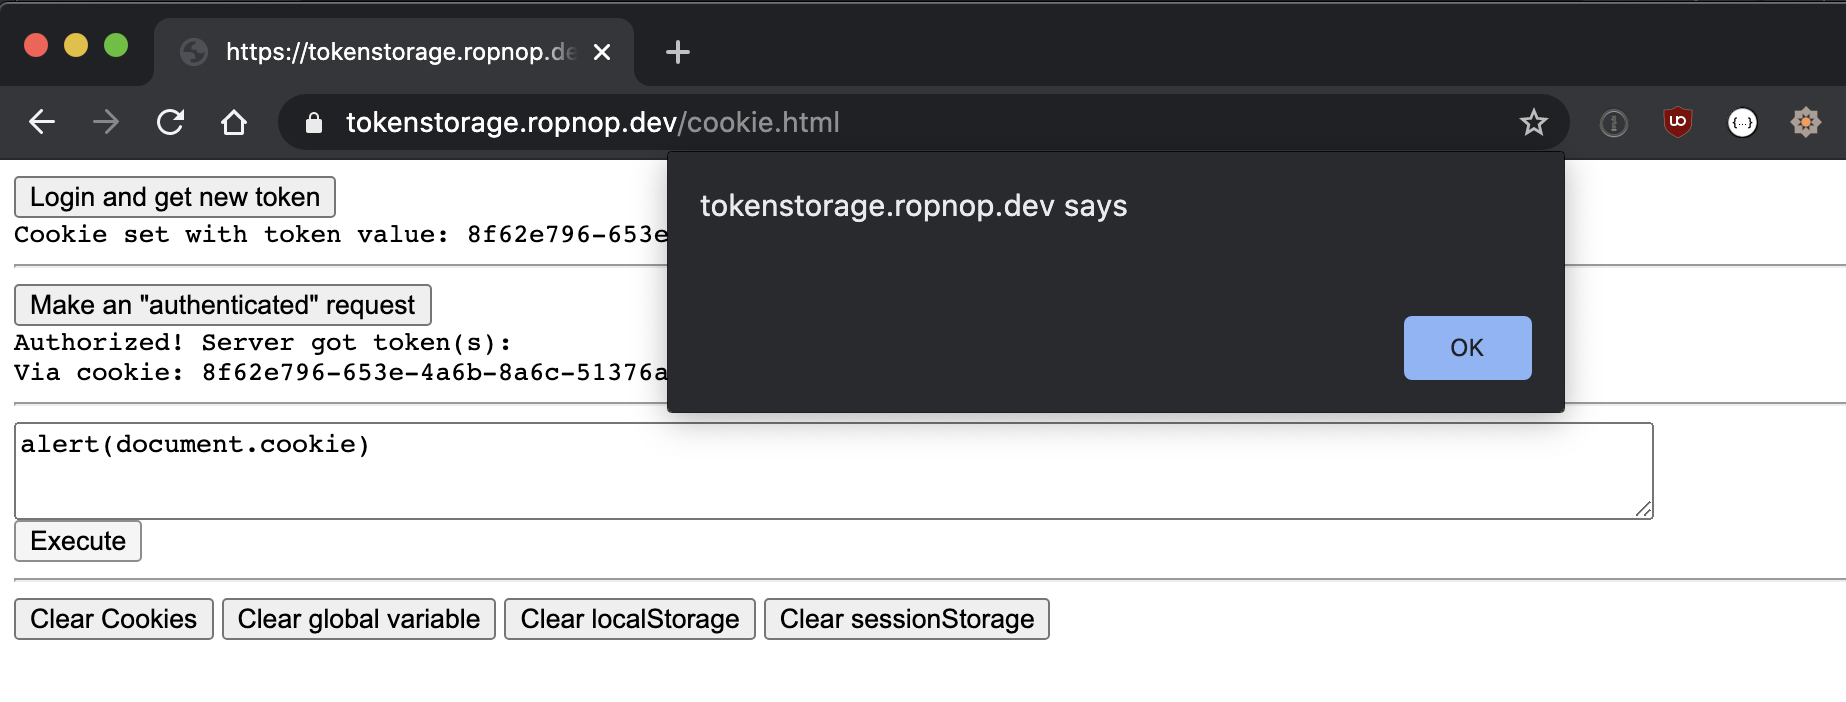
Because this cookie was set with HttpOnly, it is inaccessible from any client side JavaScript code. If an attacker gains XSS on our SPA, there is no way for the attacker to read the cookie value. Try it yourself by entering alert(document.cookie) into the XSS box and see that no value can be read or displayed:
However, it is important to remember the even though an attacker cannot read the cookie value, he or she can still use the cookie value. Because the browser sends the cookie along with every request to a matching domain, if our XSS payload was fetch("/api/echo"), the cookie would be automatically sent and the attacker could read the response.
Cookies Summary
- Pros
- Easy to implement. Nothing custom needed client side (browser handles auth for us)
- Inaccessible from JS if
HttpOnlyis set
- Cons
- Sent automatically, which can lead to unintended consequences (CSRF)
- Can not send cross-domain
- Persistence
- Survives new pages, tabs, refreshes, etc
- Persists until intentionally cleared or expired
- Controlled from server via Cookie MaxAge or Expires attribute
Local Storage
- PoC Page: https://tokenstorage.ropnop.dev/localStorage.html
- Source Code: https://github.com/ropnop/tokenstorage/blob/master/localStorage.html
In this and the following examples, the server responds with the session token in a JSON body, which means it is up to us (the client) to manage it. One way to do that is to use the browsers LocalStorage API. This is persistent storage scoped to an origin.
On the client side code, the token response is saved to localStorage after hitting the “Login” button (line 11 below):
|
|
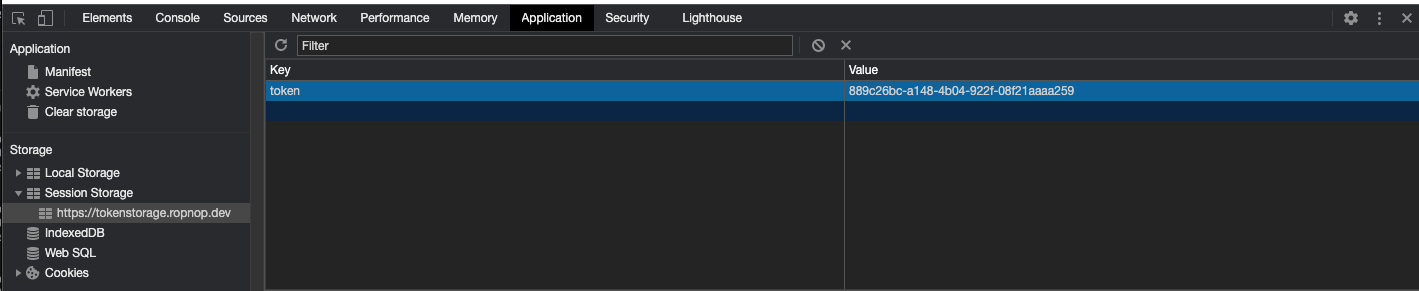
The token is now set in localStorage, which we can verify in developer tools:

With the token in local storage, it’s again up to the client to send it (usually in an Authorization header). We have to fetch it from localstorage if it exists (line 3-4), and then send custom headers with our request (line 6):
|
|
As opposed to the cookie method, we have to be explicit in sending a custom header in our client code.
XSS Impact
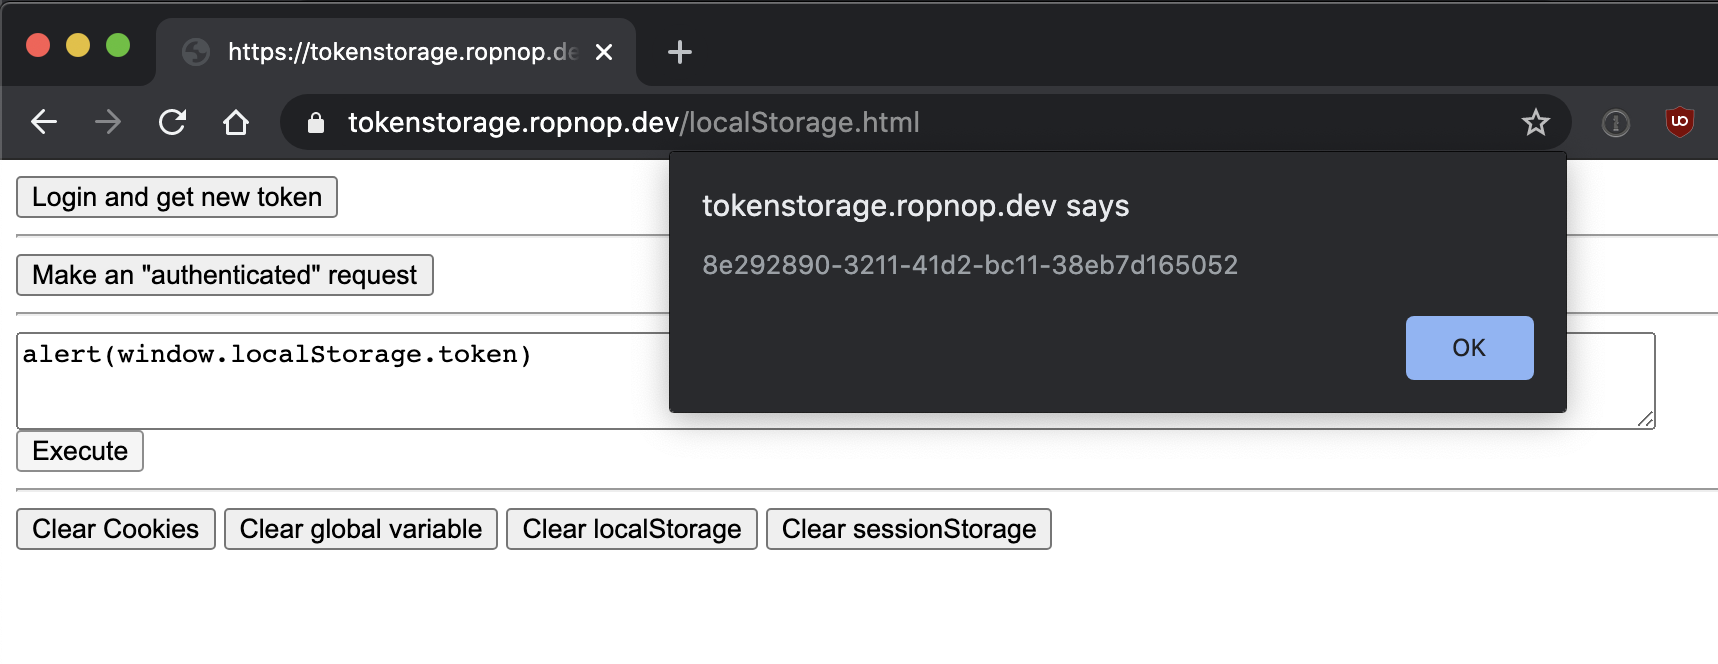
Unfortunately, LocalStorage provides no XSS protection. Since the value needs to be read by JavaScript, any “malicious” JavaScript executing in the same origin (i.e. XSS) will have full read/write over everything in Local Storage. Verify it yourself by running alert(window.localStorage.token):
Local Storage Summary
- Pros
- Persists across refreshes/pages closed
- Scoped to origin, not domain
- Never sent automatically anywhere (CSRF impossible)
- Cons
- Easily stolen via malicious JS (XSS)
- Persistence
- Survives new pages, tabs, refreshes, etc
- Persists until intentionally cleared
Session Storage
- PoC Page: https://tokenstorage.ropnop.dev/sessionStorage.html
- Source Code: https://github.com/ropnop/tokenstorage/blob/master/sessionStorage.html
This is almost identical to LocalStorage, with one important difference: SessionStorage does not persist across browsing contexts, meaning it is destroyed if you close the page.
Setting the token is almost identical to Local Storage, we just use a different API to save the token after retrieving it:
|
|
After it’s set, we can again verify it in Developer Tools:
To send an authenticated request, we again have to retrieve it from SessionStorage and send it as a custom header:
|
|
Again, the only difference between LocalStorage and SessionStorage is persistence. If you close the window or open a new one, the token value will disappear from SessionStorage, as opposed to LocalStorage.
XSS Impact
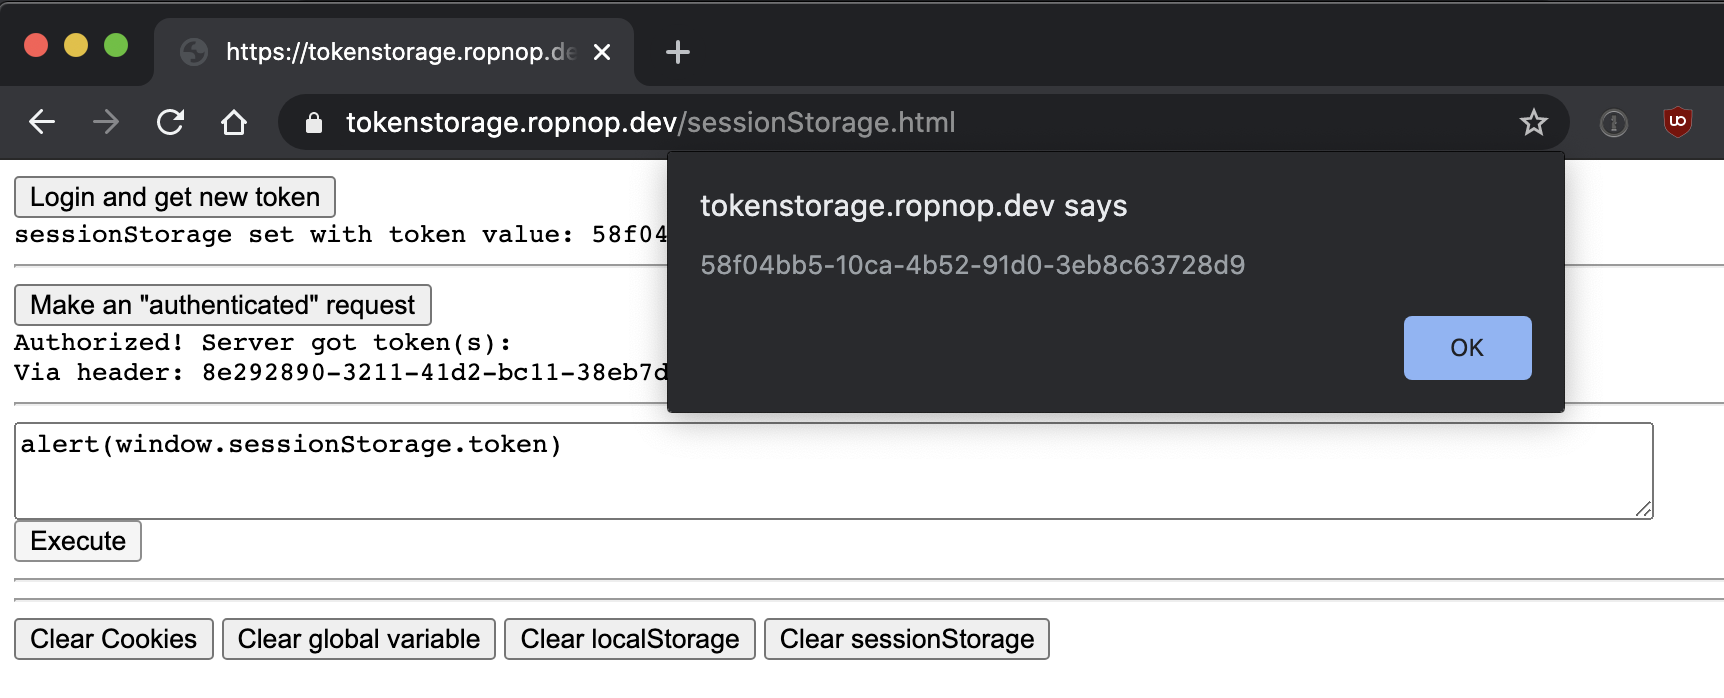
Just like with LocalStorage, SessionStorage offers zero protection against XSS, since it is designed to be read and write from JavaScript. You can verify by running alert(window.sessionStorage.token) in the PoC Page:
Session Storage Summary
- Pros
- Scoped to origin, not domain
- Never sent automatically anywhere (CSRF impossible)
- Cons
- Easily stolen via malicious JS (XSS)
- Persistence
- Only for current browsing context
- Does persist across refresh
- Lost when page closes or on new page/tab
Global Variable
- PoC Page: https://tokenstorage.ropnop.dev/globalVar.html
- Source Code: https://github.com/ropnop/tokenstorage/blob/master/globalVar.html
In the next few examples, we won’t leverage any browser storage at all and instead just rely on our running client side JavaScript to store, set and retrieve the session token.
The simplest way to achieve this is to just use a top level global variable. This variable will be available to any of our running client side code inside any function we need it.
To demonstrate, I set a top level variable, token, on the window, and set it when the token is retrieved from the login API:
|
|
To set it as an Authorization header, I just refer it to by its variable name:
|
|
This is pretty easy to implement, and the variable is usable whenever it’s needed. This will not survive a page refresh or a new browsing context - the variable will be wiped out as soon as the JS gets reloaded.
XSS Impact
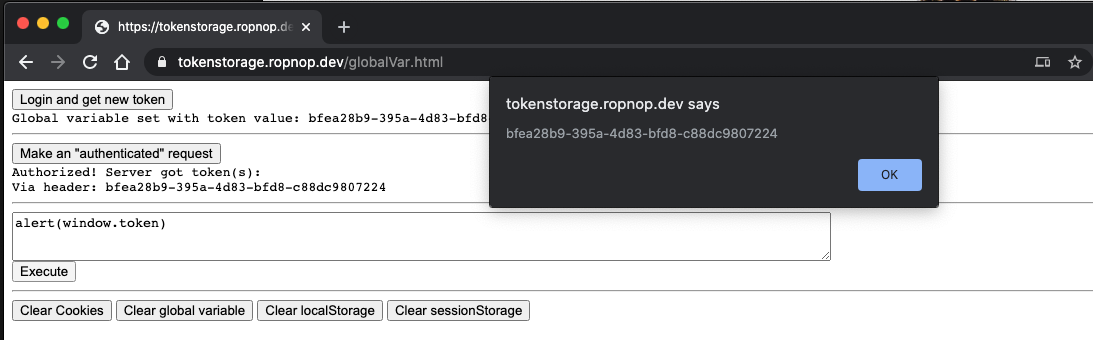
Since the token is just a JavaScript variable, it’s trivial to read the value if the attacker gains malicious JS execution. The only thing he or she would need is to just figure out the name of the variable by looking at the client side code. To verify yourself, try entering alert(window.token) or alert(token) in the XSS box:
Global Var Summary
- Pros
- Easy to implement
- Token value only exists “in memory”
- Can be sent cross-domain
- Cons
- Easily stolen by malicious JS (XSS)
- Persistence
- Lost on page refresh or new page
Closure Variable
- PoC Page: https://tokenstorage.ropnop.dev/privateVar.html
- Source Code: https://github.com/ropnop/tokenstorage/blob/master/privateVar.html
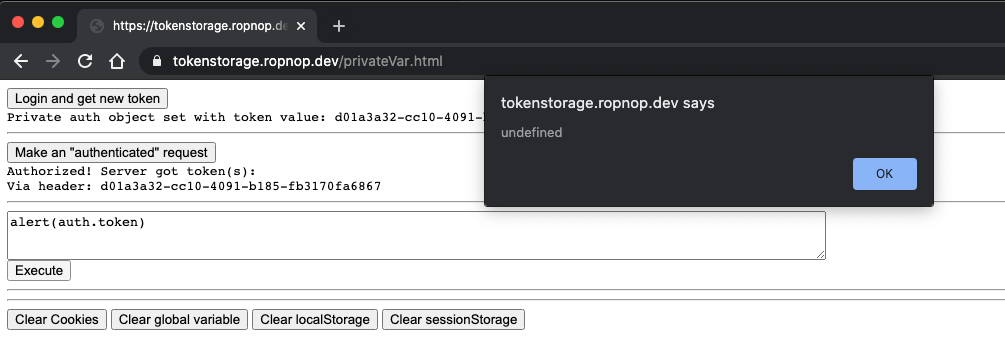
Now we are finally getting to what I consider to be the most secure ways of storing session tokens in browsers. In this example, we are again keeping the session token value only “in memory”, but are protecting it so that its value can be used, but never actually read from any other JavaScript. This is possible by storing it is a variable inside a closure (if it helps, think of it as roughly akin to a private variable inside a class).
Architecturally speaking, the only thing we ever need our session token for is sending an HTTP request, so we can design our closure to expose a fetch function that automatically appends the token value. The only other thing we need exposed is a way to set the token. My example closure looks like this in vanilla JS:
|
|
This closure, called authModule only exposes 2 functions: setToken and fetch. After setting the token value, it is impossible to read it again. The closure’s this.fetch function mimics the real fetch function, but will append the Authorization header if the destination origin matches the whitelist. This is really important, because if you didn’t have this check this module would send the Authorization header to any domain, and an attacker could abuse this through XSS by sending the sensitive token to themselves.
Before logging in, we now instantiate a new authModule (1) and when we retrieve the token we set it (13):
|
|
Now, any time we wish to send an authenticated request, we can use auth.fetch instead of plain fetch (I’m adding a custom header just to demonstrate they get sent as well):
|
|
XSS Impact
In this case, the XSS impact is very minimal. Just like with an HttpOnly cookie, the value of the token itself is impossible to extract using JavaScript. An attacker could use auth.fetch inside their XSS payload, but they can only send the authorization header to a whitelisted origin. Feel free to try to retrieve the token value via XSS - I would actually love if someone could figure out a way to access it!
Update - 10/5: Gauntlet thrown down! @coffeetocode demonstrated a brilliant XSS payload that overwrites the normal fetch operation to steal the authorization cookie. I’ve updated the code to include a protected copy of fetch inside the closure:
|
|
Love the bypasses - keep em coming!
Closure Summary
- Pros
- Token value only exists “in memory”
- Can be sent cross-domain
- Token value is protected from other JS code
- Granular control over where/when token gets sent
- Cons
- Slightly more complex to implement
- Persistence
- Lost on page refresh or new page
Service Worker
- PoC Page: https://tokenstorage.ropnop.dev/serviceWorker.html
- Source Code: https://github.com/ropnop/tokenstorage/blob/master/serviceWorker.html, https://github.com/ropnop/tokenstorage/blob/master/js/serviceWorker.js
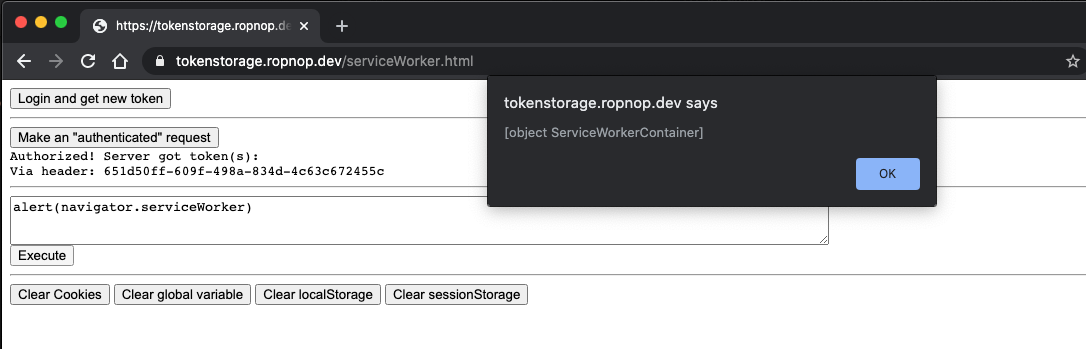
The last method I’ll discuss is probably the most complex, but IMHO the coolest way to handle session tokens in a browser, and that is via using Service Workers. I didn’t have much experience using Service Workers before this, but they are incredibly powerful additions to the standard Web APIs. Service Workers are essentially in browser proxy servers that execute in their own context and will persist between refreshes and new page loads. We can use a service worker to remember our session token for us and then send the session token for any network resources that require it.
First, we need to register the service worker on the page that we want the service worker to monitor. In our SPA that looks like this:
|
|
On line 4 I am limiting the scope to only be this specific page, but in practice we could have this run across every page with / instead.
The actual ServiceWorker code is a bit complex, but the core functionality should look similar to the Closure logic above. There is a whitelisted set of destination origins, and I’ve also implemented a regex for paths as well:
|
|
Instead of creating an exposed function to set the token value like we did in the closure example, we need to use postMessage to send the token value to the service worker. This acts as a sort of “RPC” since the Service Worker runs in its own context and origin. So we set up a listener to receive a token value and set it:
|
|
Now, back in our SPA, we send the token value we receive after logging in to the service worker:
|
|
Now the service worker has the token value and will remember it.
To use the token, we can use the magic of service workers to intercept every single fetch call and determine if we need to add the token value. We do this by setting an event listener for fetch in the service worker:
|
|
With this event listener running, any normal fetch we make in our SPA will automatically have the secret token sent if the destination is whitelisted. So we can just use our normal fetch and not have to worry at all about authentication (kind of like we can wih cookies):
|
|
Go ahead and try it out on the PoC page. Close the page and refresh as well, then try sending the authenticated request without requesting a new token - the service worker remembers the previous token!
XSS Impact
Similar to the closure, there is no XSS impact here. As far as I can tell, there is no way for XSS in the SPA to access or modify the values inside the service worker. The only thing an attacker can do is set a bogus token value through a postMessage, or send an authenticated request from the victim’s browser using fetch. If you can figure out an exploit please let me know!
Service Worker Summary
- Pros
- Token value only exists in service worker
- Can be sent cross-domain
- Token value is protected from other JS code
- Granular control over where/when token gets sent
- Token is automatically appended - no special client side code to send auth’d requests
- Cons
- Much more complex to implement
- Persistence
- Persists across refreshes and new page loads
- Persists until service worker unregistered/updated
Conclusion
I hope this helps illustrate the concepts behind the different ways of storing and sending secret tokens in a browser. My goal was to demonstrate through as simple PoCs as possible what each option looks like, and then evaluate the XSS impact and persistence of each.
I want to stress again this is not production-grade code, and I’m sure there are lots of ways things can and should be improved. Please provide any feedback/ideas/bypasses you have!
In a future post or talk, I can actually get quite opinionated on which method is the “best” and what architecture I would recommend if I was designing a new SPA from scratch.
-ropnop